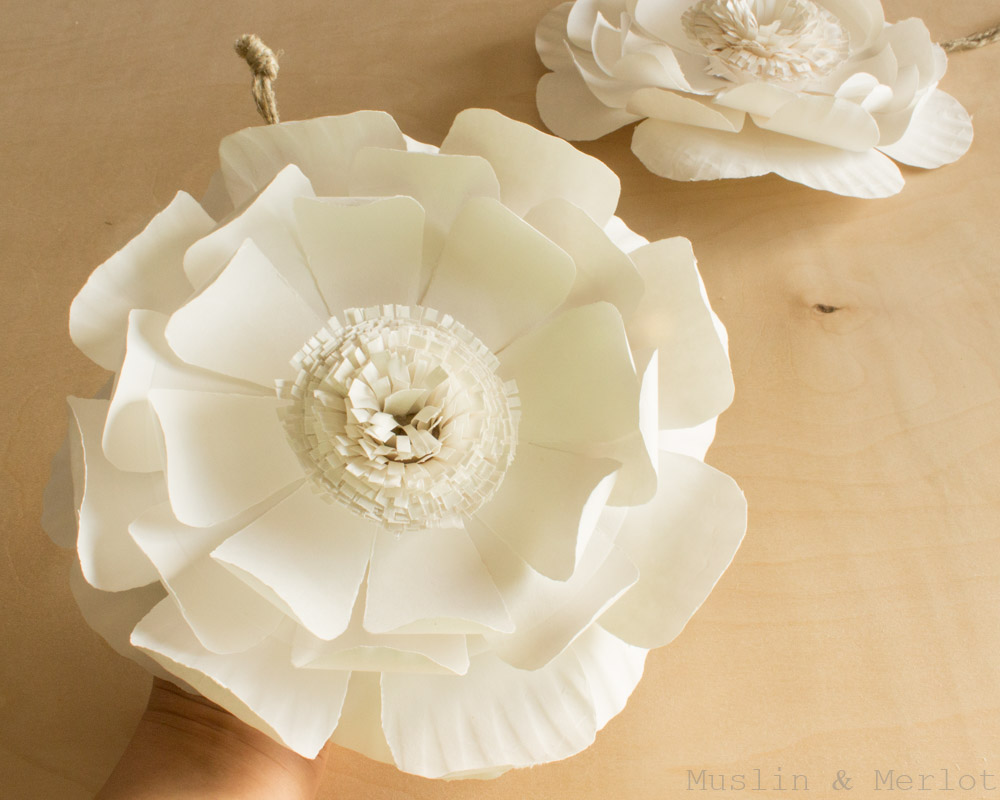
Turn cheap paper plates into smashingly gorgeous flowers? Yes, please.
This tutorial is based on Parties for Pennies' Paper Plate Flower tutorial! Click here to see it!
These would be great for wedding showers or other parties. Very frugal craft.
You will need:
- (5) 9-inch Paper Plates
- Scissors
- Hemp Cord or Metal Fasteners
- Round (not beveled) Pencil
- Marker or Round-Handled Wooden Spoon
- X-acto Knife
- Hot Glue Gun
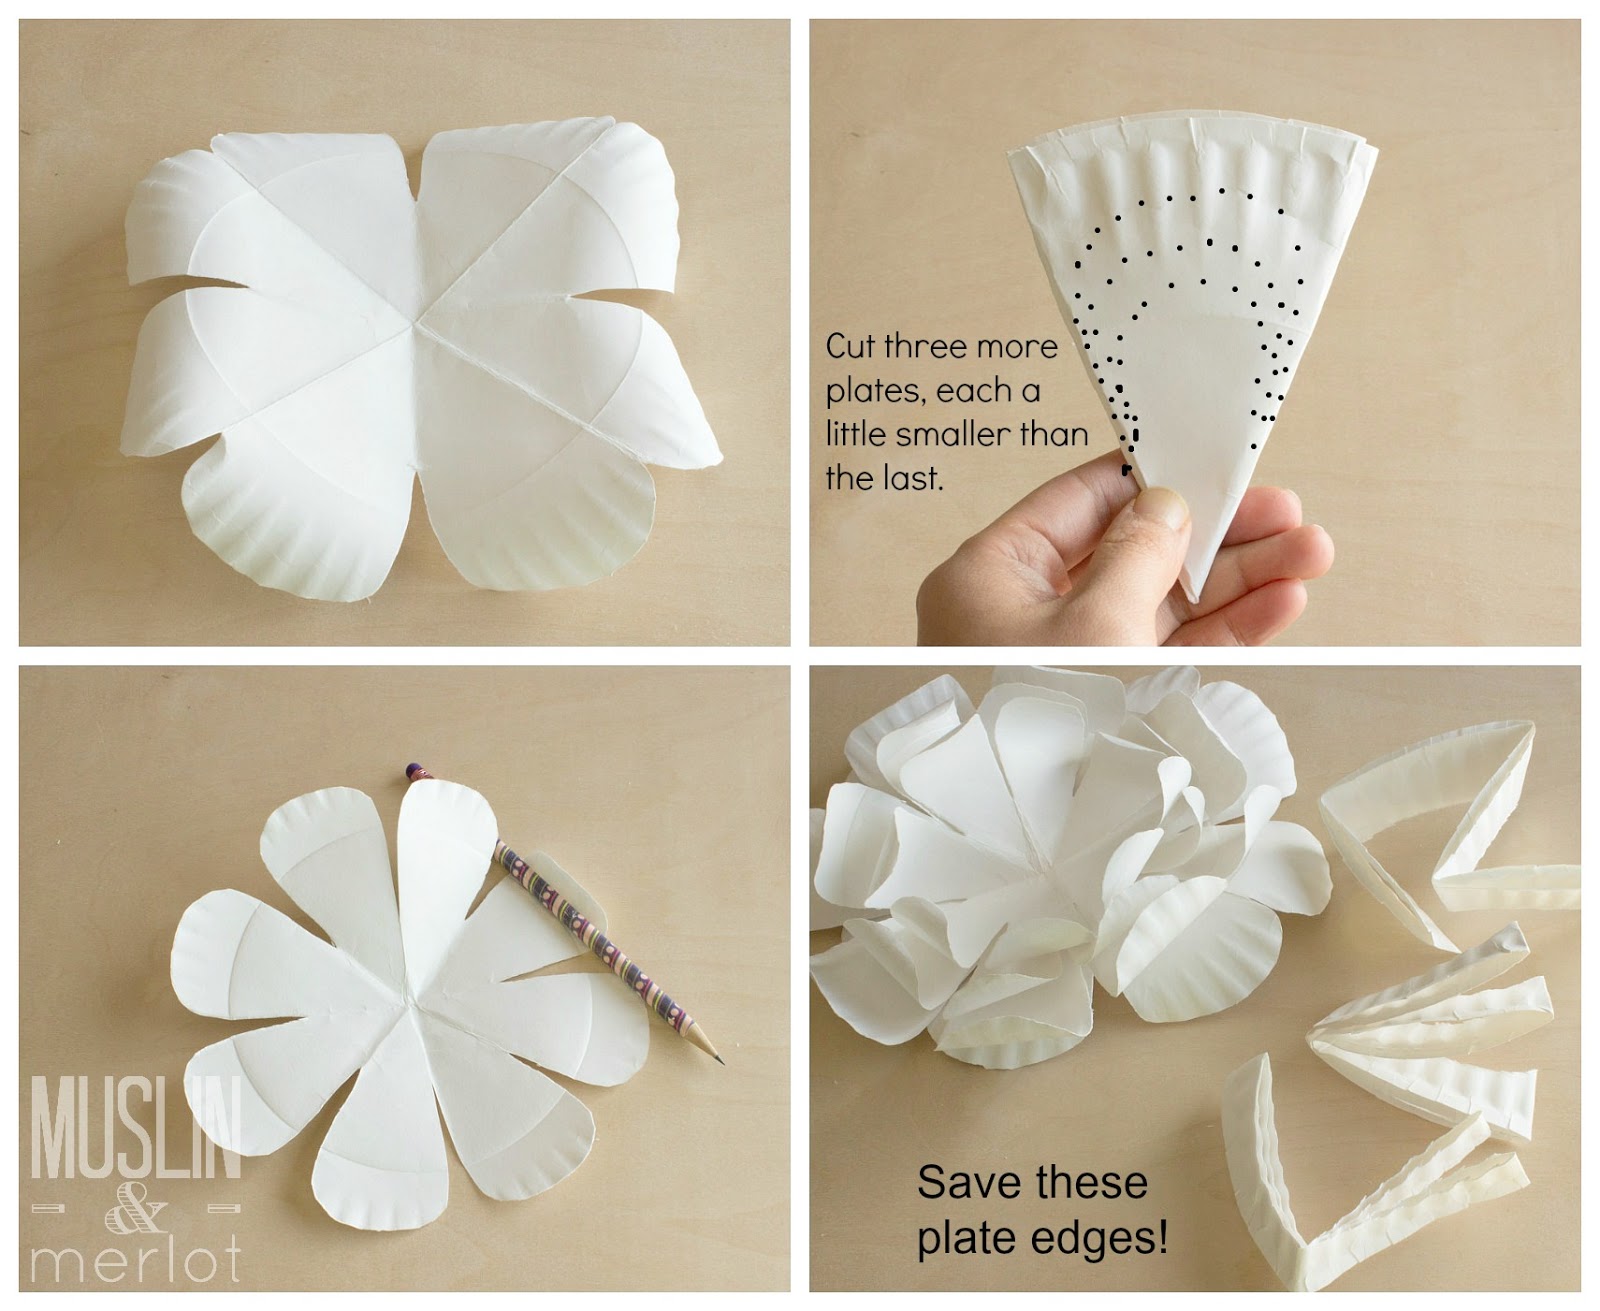
Fold paper plate on dotted lines.
Cut paper on black dots. One side will be cut deeper than the other. You'll end up with a shamrock once the plate is unfolded.
Bend each curved edge around a large marker or the handle of a wooden spoon.
Lay the first plate, curved edges DOWN.
Fold and cut three more plates, each a little smaller than the last. Cut the edges evenly, not like the first plate. Save the cut edges! We'll use those later.
Use a pencil to curl the petals inward.
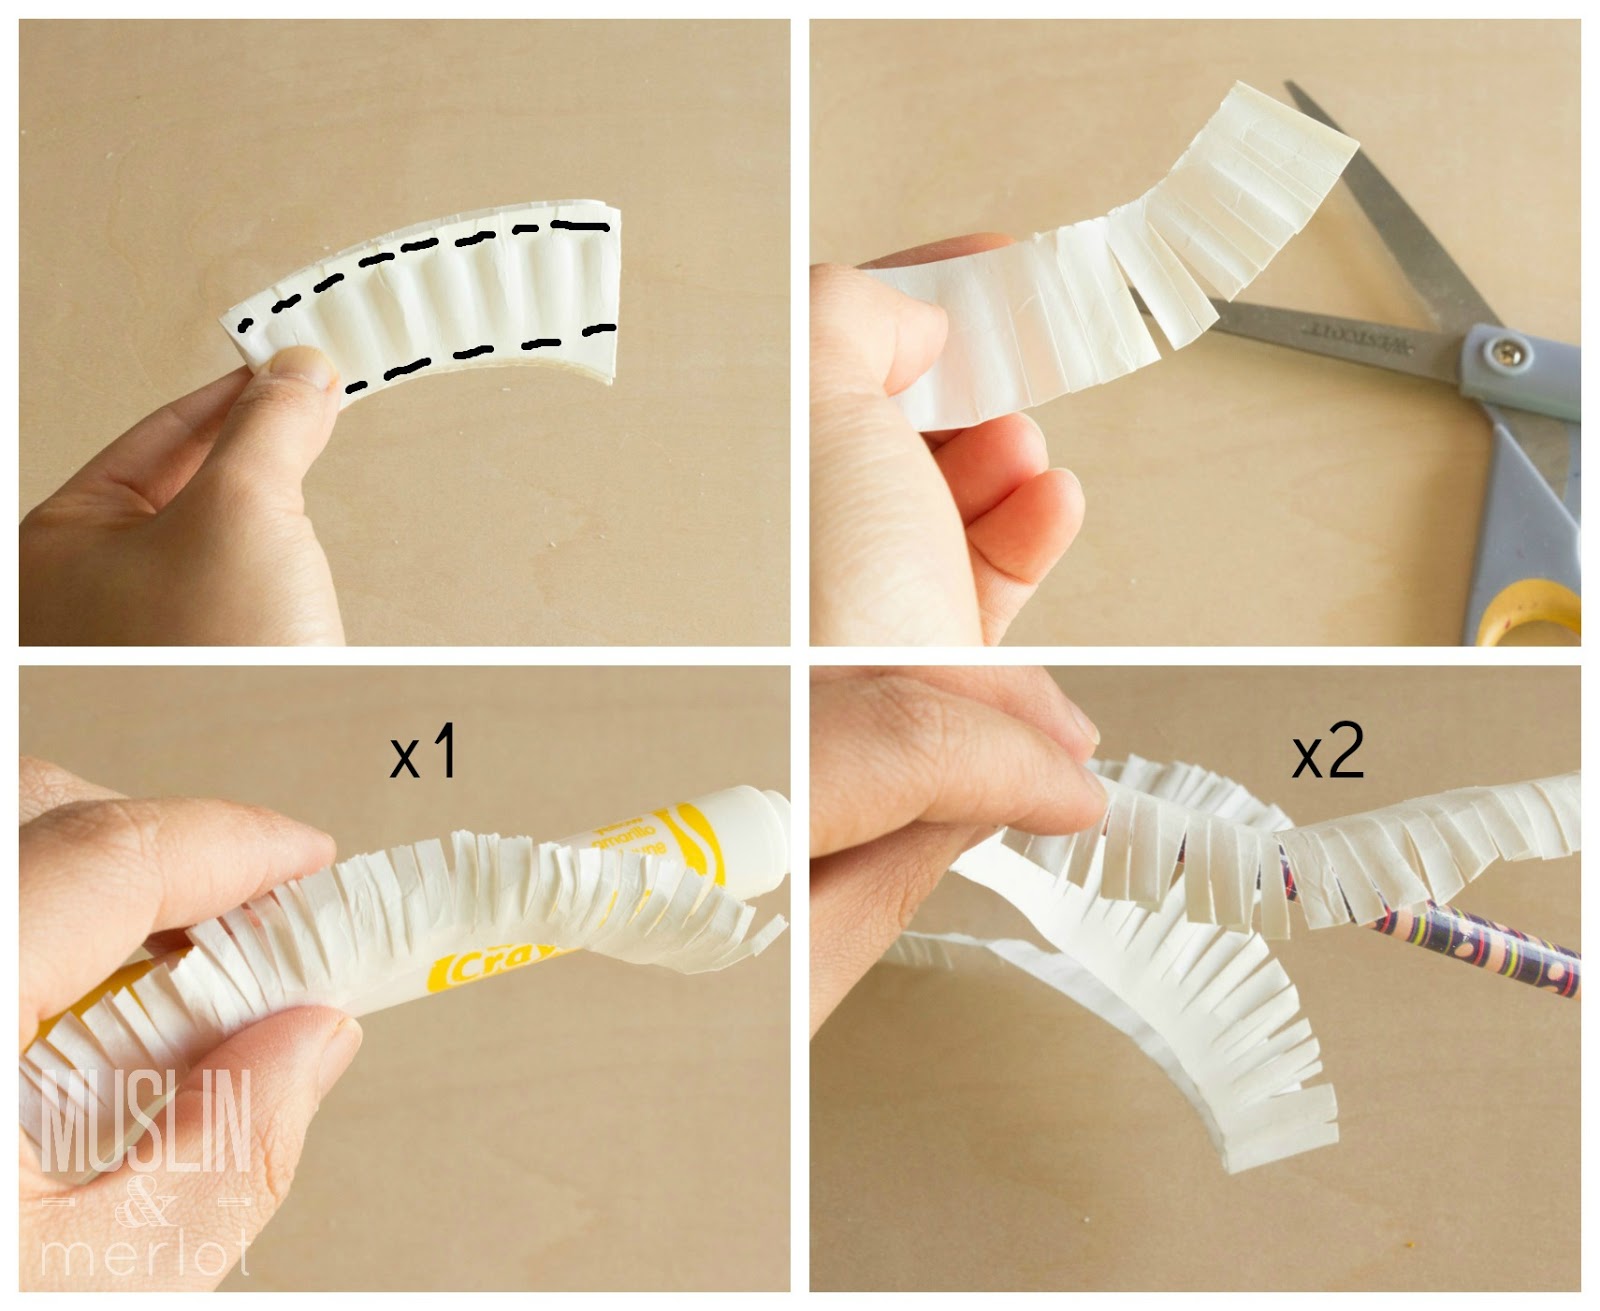
Keep the leftover edges folded together. Cut off the top and bottom edge.
Still folded together, fringe the edge. Repeat with two more leftover edges.
Press the fringe of ONE leftover edges against a wide marker.
Press the fringes of TWO leftover edges against a pencil.
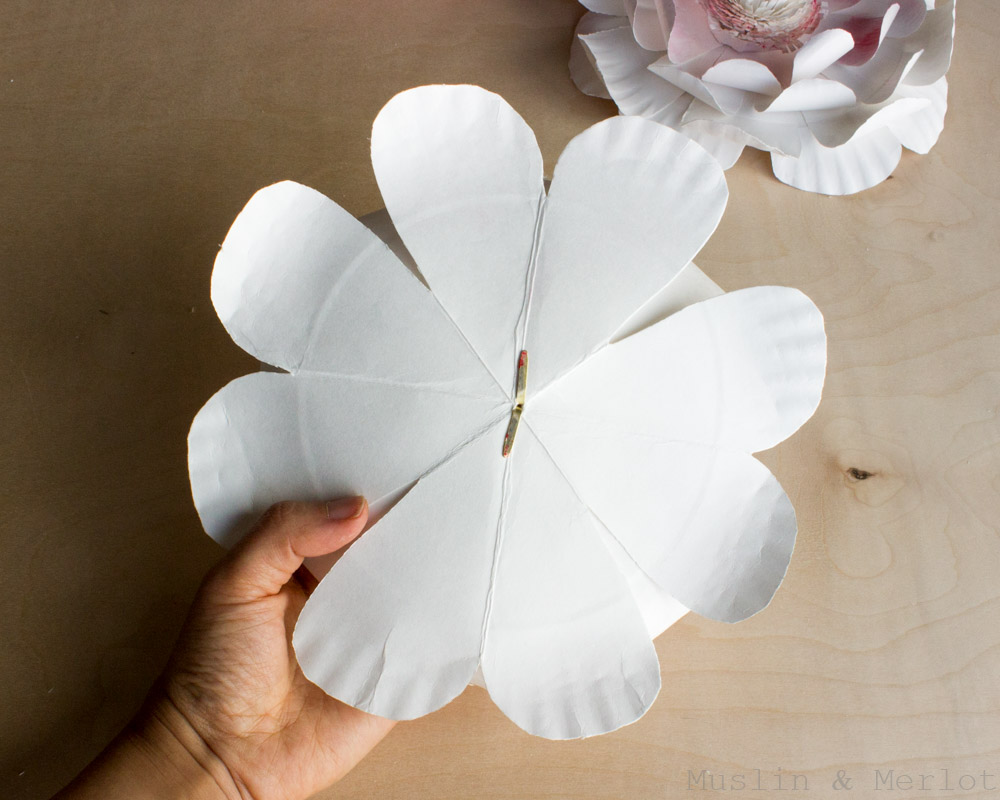
Use the X-acto blade to cut holes in the center of each flower.
Place a paper fastener through all the layers
OR cut a three foot length of hemp cord. Fold it in half. Make a knot at the folded end. Knot again once or twice.
Thread the hemp through the flower petals. The knot should be in the center of the flower.
Tie and knot the hemp at the back of the flower.
Pull the hemp straight. Knot the end.
Cut a medium piece from the fifth plate. Sandwich the hemp between the back of the flower and the medium place of plate. Glue in place.
Start rolling up the pencil-curled fringe. Make sure the fringe is pointing outward.
Leave it slightly loose in the center so that it will fit over the hemp knot. Glue at regular intervals until you reach the end of the first fringe. Glue the end to the second fringe. Keep rolling. Glue third (marker-rolled) fringe.
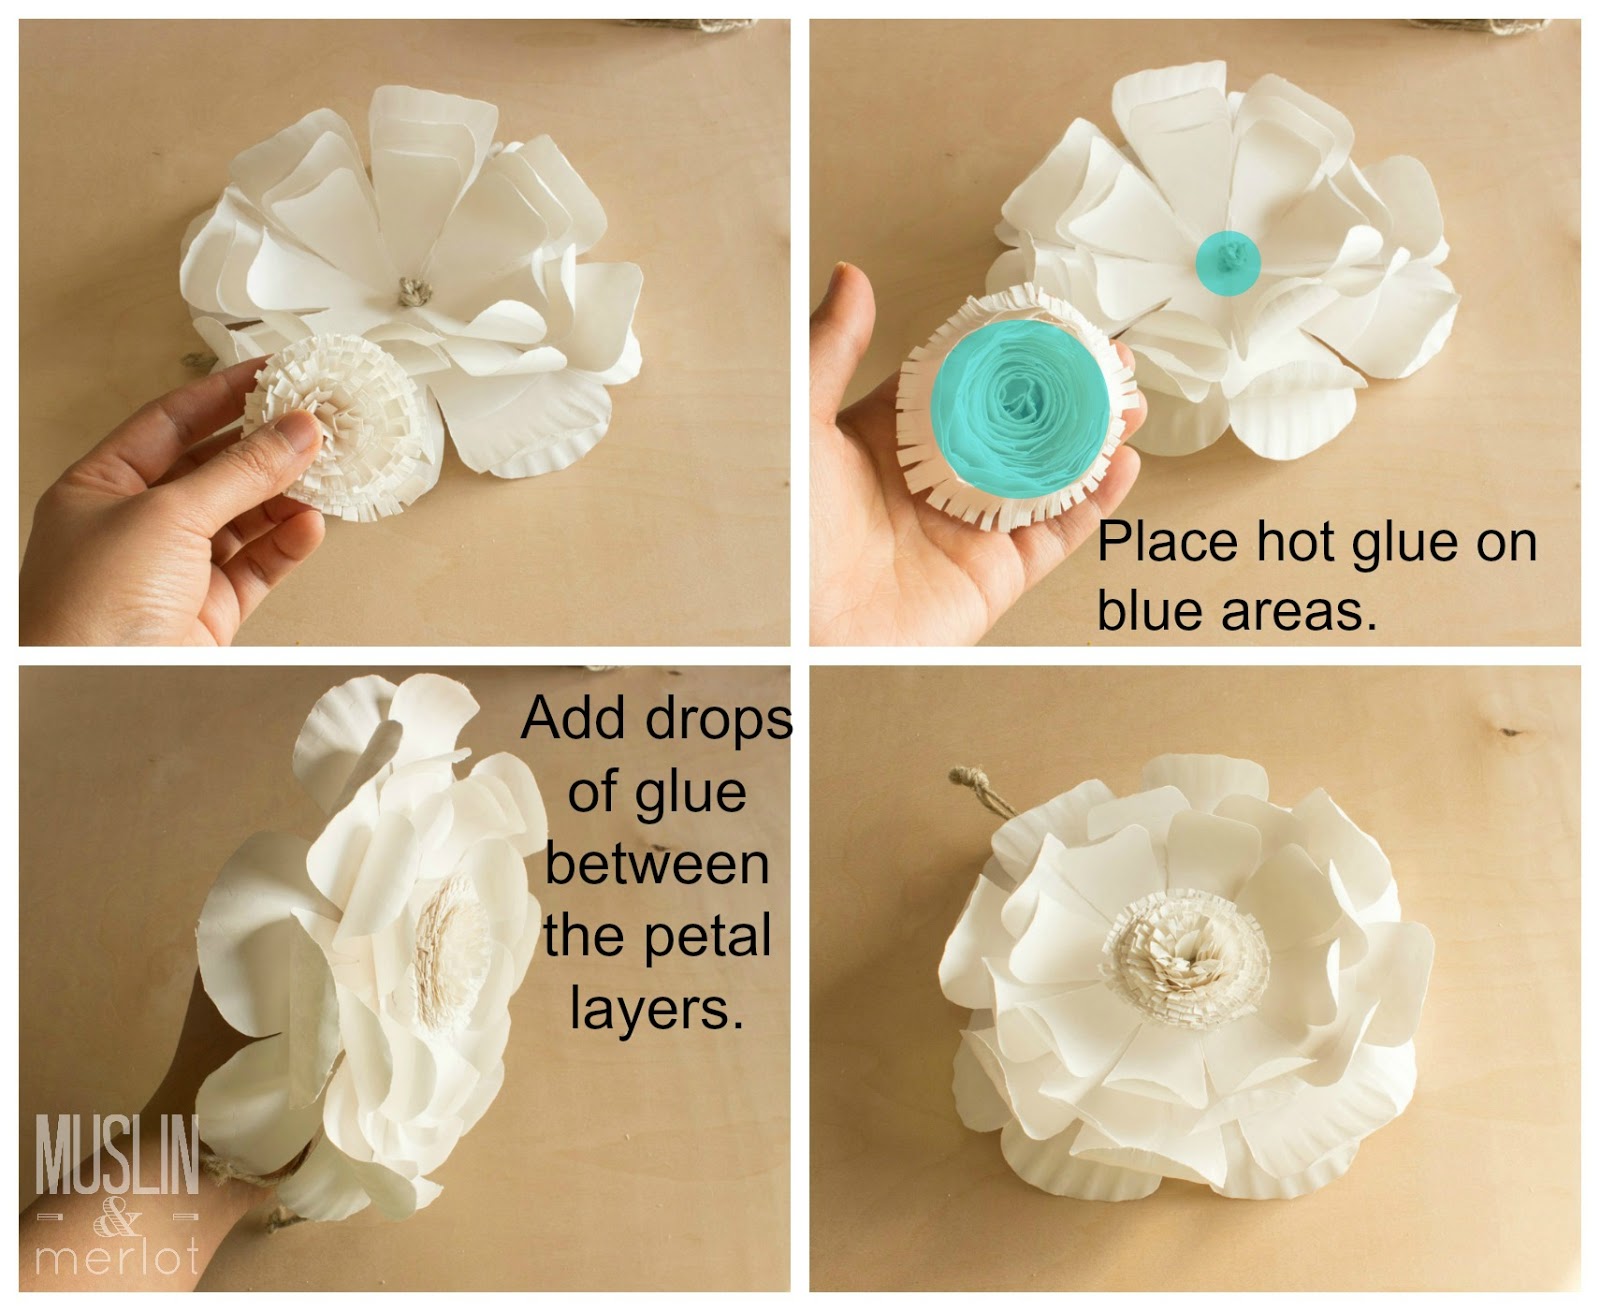
Place hot glue all over blue areas. Press and hold together until the glue cools.
Decide how to layer the petals. I offset my petals (third picture below) so that it would look like a full-blown tea rose.
Add drops of glue between the petal layers to help keep the petals in place.
I used a fan brush and watercolors to give them a pretty tinted hue.







I love this idea. I would never have thought paper plates could be so pretty. These flowers would make the most amazing bridal shower backdrop on a wall behind the desserts.
ReplyDeleteThat's a great idea, Brenda! Thank you :-).
DeleteReally pretty - I never would have thought to use paper plates to make flowers!
ReplyDeleteThanks Ann! Paper plates are the perfect crafting supply - so cheap and versatile!
DeleteI love the texture that the wavy edge of the paper plate adds! Beautiful. Love the idea, and I'd love to have you link this project to our Party Time link party! http://tikkido.com/blog/link-party-37
ReplyDeleteThank you Nicole! I will add your link party to my list!
DeleteGreat and very reasonable to make for any occasion. Great. Thank You
ReplyDeleteThks for sharing
ReplyDeleteFantastici! Straordinari thks
ReplyDeleteI definitely want to try this on my own.... then with my daughter... its a great idea..
ReplyDeleteThe flower that is all pink, is that color brushed on after as well? Is it an option to paint the plates first before cutting or will that effect the design?
ReplyDeleteYes, the color was brushed on the pink flower, too!
DeleteYou could try painting the plates first but they may warp slightly from the water in the watercolors. This will make it harder to fold, evenly cut and curl the petals. I would suggest painting after cutting/curling but before using a paper fastener or hemp to layer the petals together.
How unique!
ReplyDeleteWOW!This is so cool and beautiful! I could have never imagined.Will definitely try it out.Thanks for sharing! ! Have a great Thursday.
ReplyDeleteUsed 3 watercolor washed plates and one white for base petals to make waterlily flowers on a school wall about frog life. The children painted 3 plates each and they turned out fabulous!
ReplyDeletegreat idea!! Thanks for sharing it with us and telling us how to make paper plate flowers. I would always prefer handmade flowers, they are amazing and looks great and there won't be any chances of throwing them away because they will not dry.
ReplyDeleteThank-you for sharing this great inexpensive idea to make flowers, I am always looking for crafts or decorations for girls camp,
ReplyDeleteIt’s so beautiful and amazing, it doesn’t look very complicated, I have to try it.
ReplyDeleteI love these, great DIY tutorial.
ReplyDelete